
 This RSS aggregator for various fetish and bondage resources (the list is being updated constantly).
UNMODERATED!! MAY BE NOT SUITABLE FOR WORK OR A LIVING ROOM WITH FAMILY AROUND!!!!
This is a live stream, posts may disappear forever at any time, so if you find something interesting, do not wait! Save the images and post them in the forum.
Check several pages for updates, because new posts may appear anywhere for several reasons (e.g. new stream added, wrong post date, etc.). Duplicate, triplicate, etc posts is a known Blogger issue, and is being worked on.
Leave you suggestion in the comment field below, or in this forum thread.
See other RSS streams.


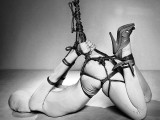
Source: FetishLover

As you can see from the photos, the structure isn't based on fine mortise-and-tenon joinery. I used the poor-man's method of wood glue and a shit-load of screws. I was fine with that, as everything but the legs gets covered with upholstery anyway. And trust me, this baby is strong and rigid. I toyed with the idea of tapering the legs, but if you see the antique versions (1stDibs usually has a great, if expensive, selection) they typically have straight (un-tapered) legs.
For the next step, I just laid the foam over the horse and wrapped it in plastic. I cut a couple of pieces from the foam to cap the ends.
Next up: duct tape. Longtime followers of this blog know that it's my preferred method for generating custom pattern shapes for complex objects.
A couple of layers on, until everything's nice and smooth. Do you notice the lip on the left side of the image below? I thought I'd try something clever there, and make a space for someone to fit their head between the horse and someone straddling the horse. Didn't really work out, so I'd recommend keeping the sides a cleaner, traditional symmetrical shape.
Draw potential seam lines out with a marker.
I was toying with the idea of it wrapping around a bit…
Cut the duct-tape pattern off with scissors. We end up with the main piece…
…and two end-pieces.
I'm sure at some point I traced the duct-tape pattern onto butcher paper to make the pattern. I usually make the pattern symmetrical and perfect the lines. Then it's transferred to the leather.
I ended up using darts even though I wanted to keep it as smooth as possible. This is dictated by the shape you want to make and the thickness/stretchy-ness of the leather.
This leather isn't very stretchy…
Once the end pieces are sewn on and flattened, I pull it over the foam and secure along the edge with upholstery tacks.
It came out pretty nice, and makes me want to do more furniture-type upholstered and padded stuff.
Put some stain on the legs, just to give it some color.
In this shot you can see the ridges in the foam from where it was kept in storage. Over time I expect those to come out…
And finally at least 3 coats of polyurethane to protect the finish. Sanding with fine grit in between. I've been liking the satin finish lately… Do you think I should add some forged iron rings?
Hope you liked the project! Stay tuned, more to come…
Source: A fetish leathercrafters journal

Since all I know about her work is from the writings of others, I'm including some of it below:
"These wooden heads by Nancy Grossman “with their sensory parts strapped, zipped and nailed shiut. Her famous series is a reaction to “anxiety and turmoil that weigh upon the individual in contemporary society”. When it comes to artistic influences, the exhibit description is really ignoring the big, kinky elephant in the room."
Written by Marina Galperina May 20, 2011
Physical abuse in the artist’s early years and to some disturbing, inappropriate sexual attention from a male relative in her adolescence. Ms. Raven quoted Ms. Grossman: “After 25 years, I see that all of the head sculptures are self-portraits that refer to the bondage of my childhood.” That could partly explain her seemingly obsessive repetition of the image of the enigmatic, scary yet alluring, possibly predatory man.
But the heads might also be flirtations with a powerful but otherwise buried part of herself. The potential of the female artist had yet to be widely acknowledged in the late ‘60s. Ms. Grossman’s early heads were ferocious harbingers of the coming feminist insurgency.
Whoever or whatever that masked being was, he, she or it possessed Ms. Grossman like an occult spirit and led her to create figures that are as darkly weird as they are sensually beautiful.
Ms. Grossman’s heads seem to partake in a chilling depersonalization of sex at the same time as they celebrate demonic, thrill-seeking anonymity.
But there are other dimensions too. They can be taken as allegorical figures of extreme states of male consciousness.
Some have all of their orifices covered, which adds to the feeling of hidden, pent-up intentions and blind ambitions. Some have animal horns protuding from their foreheads. Others bellow and howl with toothy maws. Altogether they radiate a primal warrior’s spirit. Yet at the same time they appear captured by the gear they wear. They cannot escape tbeir own archetypal natures.
If you know Ms. Grossman’s heads only from reproductions in art books, you may be surprised at how lovingly they are made. She began by carving, filling, sanding, painting and polishing a chunk of found wood - a piece of telephone pole, say - into something resembling a classical or neo-classical head. With their strong features and thick necks hinting at muscular bodies, they read as male, although Amazonian femininity is not out of the question. As for the top layer of animal skin, only Ms. Grossman knows exactly how she fitted this covering and its hardware so perfectly to the complex topography ot the underlying sculpture.
Anyone passingly familiar with American art of the past half-century will recognize the eerie, erotically menacing leather-clad heads that Nancy Grossman produced between the late 1960s and 1990. Often including zippers, buckles, straps and chains, these sculptures most immediately evoke S&M bondage gear. Displayed in a high-end shop for the sexually adventurous, they would fit right in.
Love the red lining around the nose, and notice the use of buttons for the eyes.
Artist in her studio at age 25.
"Signing" her work with nail heads driven onto the wooden base.
Nancy Grossman being interviewed.
This monumental sculptural figure is larger than life-sized.
I hope this inspires some of you to do your own research about this remarkable artist and her powerful work.
Source: A fetish leathercrafters journal

I want to introduce you to BeE Workshop, Japan.
http://hatikoubo.blog116.fc2.com/
This gentleman is creating some of the most exciting and unique designs I've ever seen.
Custom-made straitjacket, belt set and 2-layer padded pussy mouth hood.He contacted me a while ago to let me know that my blog inspired him. I was so blown away by his work, I didn't know how to express it fully. I think in many ways he's more advanced than me as a maker. And his ideas are off-the-charts wonderful.
He developed his own unique pattern for a padded, 2-layer hood. And he created a pussy-type mouth opening - I've never seen anyone do this in leather. And as if that wasn't enough, he created a harness with detatchable mouth/pussy cover…
I like the way he has the little pussy lips closed…
I think we have a shared love of hoods and complete coverage restraints. It's always thrilling for me to see a new take on an old idea. Check out the unique, beautifully-fitted pattern for the straitjacket here. Love the attached rings, and the sleeve lacing. The collar fits beautifully. Also, love the beautiful shape on this leg restraint. A really nice fit. He has also made some beautiful armbinders in a range of different styles. I love this classic looking design:
He's also experimented with an open-hand style:
A French-maid look with frilly edges in PVC:
An over-the-shoulder style with a zip-closure:
An over-the-shoulder style that laces up:
Take a moment to appreciate this fantastic photo… An open-shoulder style with zip closure, and contrasting red straps and collar.
Cannot love this image enough…Really beautiful custom-harness strap and chain sets too… so much great work. I only know of his blog here, but will let you know if he ever puts together a stand-alone website. Don't you agree that his work is just fantastic?
Thank you BeE workshop, for sharing your inspiring work with us!
Source: A fetish leathercrafters journal

I trace my pattern on the smooth side of the leather. Rough-cut the pieces with my shoemaker's knife.
At this point I start working the leather over the edge of the workbench to take out the curl.
I do the final cut out using an X-acto knife. Try to keep the knife vertical. I'll use the diamond sharpener and hone to get the knife razor sharp for these cuts. If you do it right, it'll go through smoothly in one pass.
Blank cutout complete:
Next up, I'll round off the sharp edges with an edge beveler tool. If your tool is nice and sharp, you'll get smooth, continuous offcuts.
Edge-bevel complete!
My next step in edge-finishing is to use 100 grit sandpaper to round those edges.
Next, I'll use gum tragacanth and a piece of canvas to burnish the edge.
I do have a wood burnishing tool, but to me the canvas is the best way to get the combination of heat and pressure to consolidate the fibers along that cut edge, and get them to lay down. You want the friction to build up, and it turns out nice and smooth.
Now I'm ready for the outer leather. I cut this piece a bit oversize, and will trim it after it's glued to the veg-tan blank.
Both pieces get brushed with contact cement.
Once the glue sets up, these inner and outer layer are stuck together. The excess is trimmed carefully around the edges.
I use my cylinder-bed (which is set up to sew heavy-weight leather) to topstitch the outer and inner layers together.
At this point, I'm ready to edge-coat. Now we prepare for the rolled edge. I cut 1.75" strips for the bottom and top rolled edge. About 14" for the top, and 12.625" for the bottom.
These all get a bit of glue on their "good" side…
…as do the collars.
The edge-strip gets clipped to the collar, good-side to good-side, and stitched a bit more than 1/8" from the edge. The bottom strip is clipped and sewn the same way.
Apply glue for the rolled edge to both the backside of the collar… …and the backside of the edge-strip. Once the glue sets up, the rolled edge is folded over towards the back (inside) of the collar.Then back to the cylinder-bed to top stitch along the front side seam - holding the rolled edge in place. (This is the part that your portable sewing machine will probably not be able to handle.)The excess rolled-edge in the back can now be trimmed off.
Sometimes I'll use tape to help me see the position of the holes that need to be punched. These marks are transferred over from the pattern. But you have to be really careful that the tape won't pull up the finish on your leather. Be sure and test first!I use an oblong punch for the slots:
I use the same method for marking holes for the staple plate, which are riveted into place: The front O-ring is secured from the back via screws.
And we're done…
Locking tall posture collar in the color of your choice! Thanks for visiting…
Source: A fetish leathercrafters journal


Like this girl. Many beautiful photoshoots around the theme.
Attachment:
If you see “18+” replacement images instead of real photos, you have to log into LiveJournal. Please let me know if there is a workaround.