Hi all,
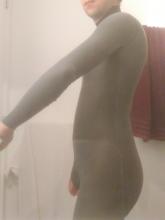
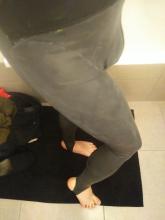
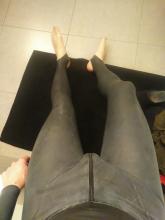
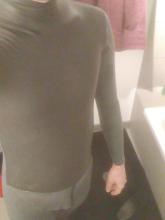
So, a sad news first. I was getting ready to make some photo to show you my home-made MTM chlorinated neck entry latex catsuit I build some month ago. Unfortunately, I tore it down from the neck to my waist so, no photo this time, sorry. 😡
😡
But, since there was some flaws in the design around the neck, I guess it should have append. The neck , was pressing on the front and loose on the back, probably not in the right angle too.
A bit of history here. I'm not a patron expert but I did not wanted to just make a simple design. I wanted the suit to be skin tight, a little smaller for hugness and as little "air area" inside. Meaning places where, due to tightness, the latex cannot follow the skin and float over it. I have this below the arm and on the back of my back with usual internet design. I also wanted the leg/body line to follow my butt. (Well, this part did not worked as well as expected as the line is too low) So I decided to take inspiration from different non-latex designs I saw on Pinterest (danse body, swimsuit, ...) as well as the small amount of latex design you can find on the internet. As this project is quite challenging on the details, I designed it using a start base from mr Doo's latex stocking design made using Valentina/Seamly2D (an open source patron designe software) ans I extended it for the whole body.
The files are linked here for you information but keep in mind I'm not an expert and did some manual adjustment. A Valentina design is supposed to be perfectly matching the entered body measure, it will probably not work everywhere.
Now the future. I don't have enough latex to build one from the ground but I want to take the opportunity to adjust my upper body design. So, I plan to make a new front body, neck piece, adjust the back and keep the arms, back and legs. As anybody an advice on how a skin-tight neck should be designed? As I did not found information this part, this was probably the most improvised part of my design so, even I believe to know what should be changed, I'd like to have some other idea on it...
For those who want to dig into Seamly/Valentina. My files will only open in Valentina as the latest Seamly was slow on curve editing my computer and it seemed that it's not update anymore, in contrary to Valentina (a fork of seamly) whose repository is heavily updated, if not the downloadable binary themselves.
I believe the following should be changed/knowed on my design
I also hope the chlorinated latex will glue enough. I already repaired chlorinated clothing and I found it quite variable. Sometimes, it's very strong, sometimes not but did not found what's the difference between them tough...
So, a sad news first. I was getting ready to make some photo to show you my home-made MTM chlorinated neck entry latex catsuit I build some month ago. Unfortunately, I tore it down from the neck to my waist so, no photo this time, sorry.
 😡
😡 But, since there was some flaws in the design around the neck, I guess it should have append. The neck , was pressing on the front and loose on the back, probably not in the right angle too.
A bit of history here. I'm not a patron expert but I did not wanted to just make a simple design. I wanted the suit to be skin tight, a little smaller for hugness and as little "air area" inside. Meaning places where, due to tightness, the latex cannot follow the skin and float over it. I have this below the arm and on the back of my back with usual internet design. I also wanted the leg/body line to follow my butt. (Well, this part did not worked as well as expected as the line is too low) So I decided to take inspiration from different non-latex designs I saw on Pinterest (danse body, swimsuit, ...) as well as the small amount of latex design you can find on the internet. As this project is quite challenging on the details, I designed it using a start base from mr Doo's latex stocking design made using Valentina/Seamly2D (an open source patron designe software) ans I extended it for the whole body.
The files are linked here for you information but keep in mind I'm not an expert and did some manual adjustment. A Valentina design is supposed to be perfectly matching the entered body measure, it will probably not work everywhere.
Now the future. I don't have enough latex to build one from the ground but I want to take the opportunity to adjust my upper body design. So, I plan to make a new front body, neck piece, adjust the back and keep the arms, back and legs. As anybody an advice on how a skin-tight neck should be designed? As I did not found information this part, this was probably the most improvised part of my design so, even I believe to know what should be changed, I'd like to have some other idea on it...
For those who want to dig into Seamly/Valentina. My files will only open in Valentina as the latest Seamly was slow on curve editing my computer and it seemed that it's not update anymore, in contrary to Valentina (a fork of seamly) whose repository is heavily updated, if not the downloadable binary themselves.
I believe the following should be changed/knowed on my design
- It's a male design
- the butt line is too low for my taste so, I will (later) change it
- the back of the neck is too low. I don't know if I mismeasured it or if its something else in my design
- the neck is eased by 0.9, I think it should be at least 0.95 to be comfortable on long wear
- There are 2 vertical line on the left part. These where framed to check that the seamed line of the butt had the same length in the body and in the legs. The 3 ones on the right have the same purpose for the arm/body seam.
- There is a cut on the back body piece, it's there to shortened the line as I have a bigger front waist line than back waist line. This was the cause of the "air" on my back. Thanked to this, I have much less air, still a little as my back is curved. I believe I'll have nothing better.
- There is a zipper missing in the files for the butt/crotch. I added it manually : 4way zipper to I can have a butt plug and my cock on the outside while not feeling the opened aire between the two which I hate. You can start it from the high hip on the front but U believe it should go a little higher on the back as I can feel it when adding a plug. It's a little too short.
- For the feet, I wanted a separate sock for long term, below normal cloth wear. So removed the feet from the printing and made a foot line a bit like fantastic rubber. I also printed knee-high sock with the original mrdoo's design, it's just perfect 😊
- When glueing, I made mistake : the front /back seam and the arm seams should be pointing in the same direction to avoid both seams to hooked themselves...
I also hope the chlorinated latex will glue enough. I already repaired chlorinated clothing and I found it quite variable. Sometimes, it's very strong, sometimes not but did not found what's the difference between them tough...


