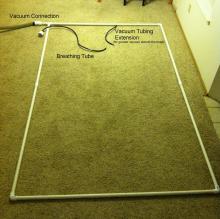
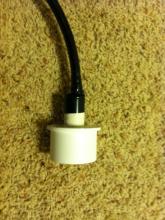
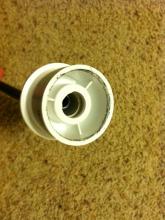
I just finished constructing an adjustable power timer and thought I'd share it with all of you nice people (and get up my first post ever on this forum).
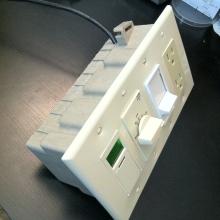
Plug it in, and a digital programmable timer will turn the outlet on and off (up to 7 programs, time resolution of 1 minute). A dimmer allows you to adjust the output voltage if desired. I have also included a mechanical timer as a safety feature - it will shut off, no matter what, after an hour. You could use this to power a vibrator, a light, a vacuum, an electromagnet, or anything else that uses mains power.
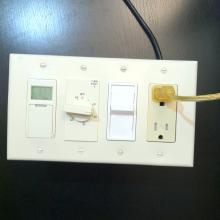
I was looking at a way to control a vac bed or a vibrator (or both). I didn't need the vacuum running at full bore the entire time (plus, there are other people living on the floor below mine, and I strive to be nice). The dimmer works great for this. It takes a little longer to evacuate the air, but that's fine by me. It works just as well, and it's quieter, and it can run longer without overheating.
The wiring looks complicated, but it's actually fairly simple.
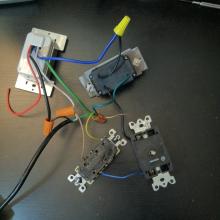
The power first goes into the digital timer. Then, the load wire runs through the dimmer, then the mechanical timer, and finally into the outlet, with the neutral wire from the input power completing the circuit (and, of course, grounding everything).
Enter your program in the digital timer, set the dimmer to the appropriate level, turn the mechanical timer to the maximum allowable time, and get ready.
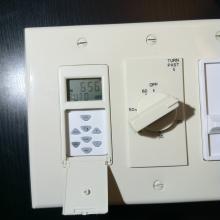
Although it seems a bit complex, this builds in several safety checks. If the power goes out, everything turns off immediately. When power is restored, the digital timer defaults to off, so you don't get stuck when the programming gets erased. The mechanical timer provides another backup in case you accidentally screw up the program or if there's some weird power surge. It will keep counting down, regardless of whether it has power or not, so even if everything else goes wrong, it will still cut off when it's supposed to. I chose a mechanical timer that maxes out at 60 minutes, but there are others that range anywhere from 5 minutes to a full day, if you so wish.
All told, the system set me back about $60 (most of that cost was the timers - I decided to go for a more pricey model because that gave me more flexibility in my design and programming). I built it in about hour (plus an extra trip to the hardware store to get a different dimmer that would fit better). Then, I decided to be nice and create a CAD drawing of the wiring diagram (also, to get better at using CAD, since it's a program that I use for work), which took me another couple of hours.

The wire colors are shown correctly in the drawing. The red wire is for a different configuration of the digital timer, so that it can be hooked to another toggle switch when you use it like you're supposed to in a building; thus, it is left unconnected. I should also note that the dimmer and the mechanical timer are switched in the drawing, though that doesn't really matter in the grand scheme of things.
It works great, and it looks pretty (I'm glad I went for the nice-looking brown fiberglass gang box instead of the blue plastic one), and everything matches, including the orientation of the screws (to satisfy my OCD!).
Remember, play safe! [Insert obligatory 'don't use a vacbed alone' and 'always have another backup or three' warnings here].
Parts list:
-Grounded [3 prong] power cable (scavenged from an old computer)
-4-gang box
-4-gang wallplate with square [Decorator] cutouts
-Digital programmable wall timer
-Spring-wound countdown timer (60 minute)
-Slide dimmer
-Duplex outlet for rectangular wallplate cutout
(This post was last modified: 07 Nov 2013, 11:39 by Like Ra.)

Plug it in, and a digital programmable timer will turn the outlet on and off (up to 7 programs, time resolution of 1 minute). A dimmer allows you to adjust the output voltage if desired. I have also included a mechanical timer as a safety feature - it will shut off, no matter what, after an hour. You could use this to power a vibrator, a light, a vacuum, an electromagnet, or anything else that uses mains power.

I was looking at a way to control a vac bed or a vibrator (or both). I didn't need the vacuum running at full bore the entire time (plus, there are other people living on the floor below mine, and I strive to be nice). The dimmer works great for this. It takes a little longer to evacuate the air, but that's fine by me. It works just as well, and it's quieter, and it can run longer without overheating.
The wiring looks complicated, but it's actually fairly simple.

The power first goes into the digital timer. Then, the load wire runs through the dimmer, then the mechanical timer, and finally into the outlet, with the neutral wire from the input power completing the circuit (and, of course, grounding everything).
Enter your program in the digital timer, set the dimmer to the appropriate level, turn the mechanical timer to the maximum allowable time, and get ready.

Although it seems a bit complex, this builds in several safety checks. If the power goes out, everything turns off immediately. When power is restored, the digital timer defaults to off, so you don't get stuck when the programming gets erased. The mechanical timer provides another backup in case you accidentally screw up the program or if there's some weird power surge. It will keep counting down, regardless of whether it has power or not, so even if everything else goes wrong, it will still cut off when it's supposed to. I chose a mechanical timer that maxes out at 60 minutes, but there are others that range anywhere from 5 minutes to a full day, if you so wish.
All told, the system set me back about $60 (most of that cost was the timers - I decided to go for a more pricey model because that gave me more flexibility in my design and programming). I built it in about hour (plus an extra trip to the hardware store to get a different dimmer that would fit better). Then, I decided to be nice and create a CAD drawing of the wiring diagram (also, to get better at using CAD, since it's a program that I use for work), which took me another couple of hours.

The wire colors are shown correctly in the drawing. The red wire is for a different configuration of the digital timer, so that it can be hooked to another toggle switch when you use it like you're supposed to in a building; thus, it is left unconnected. I should also note that the dimmer and the mechanical timer are switched in the drawing, though that doesn't really matter in the grand scheme of things.
It works great, and it looks pretty (I'm glad I went for the nice-looking brown fiberglass gang box instead of the blue plastic one), and everything matches, including the orientation of the screws (to satisfy my OCD!).
Remember, play safe! [Insert obligatory 'don't use a vacbed alone' and 'always have another backup or three' warnings here].
Parts list:
-Grounded [3 prong] power cable (scavenged from an old computer)
-4-gang box
-4-gang wallplate with square [Decorator] cutouts
-Digital programmable wall timer
-Spring-wound countdown timer (60 minute)
-Slide dimmer
-Duplex outlet for rectangular wallplate cutout

